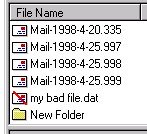
You may operate E-Mail Control Console in classic or in wizard mode. Classic mode is the default. To activate the Index Wizard, select "Help" and then "Index Wizard..." from the application menu ; optionally, you may click the Index Wizard button on the toolbar as shown below: E-Mail Control Console works with text files. This means your e-mail messages need to be exported from their vendor specific format to individual files that can be read in any text editor. Consult the documentation provided with your e-mail client application on how to accomplish this or launch E-Mail Export Shield. To do this, select "Help" and then "Export Shield..." from the application menu, or click the Export Shield button on the toolbar as shown below: This is the directory where your e-mail text files are stored and can be either a folder on the local computer or a network drive. To do this, choose "Folder" and then "Select..." from the application menu, or click the Select Folder button on the toolbar as shown below: After you have selected a directory, E-Mail Control Console will list the contents of the selected directory, much in the same way as "My Computer" or "Explorer". The question mark over the letter icon indicates that the file has not been scanned yet and therefore might or might not be an e-mail file. 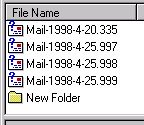
This is where the files in the selected directory are scanned and indexed according to contents. Select "Index" and then "Create" from the application menu, or click the Create Index button as shown below: The session log should now tell you how many files were indexed and how many - if any - were skipped because they could not be read or did not contain the proper information. The image below shows sample output from Step 2.
Indexed e-mail messages are denoted by the letter icon; skipped files are denoted by the crossed-out letter icon. At this time, you may click on the column headers to sort the index, if you wish. Of course you won't want to do this every time you need to access your e-mail files. To save the index to file in HTML format, select "Index" and then "Save as HTML..." from the application menu, or click the Save Index as HTML button on the toolbar as shown below: By default the index is saved as "Index.Html" in the local directory where your e-mail files are located. This enables corporate users to simply "drag and drop" the entire directory to their internal web server from where the files can be shared throughout the organization. Advanced Topics Include : |